Showing posts with label French manor. Show all posts

Friday, May 3, 2013

A Glittery Feathered Friend

      photo zebraampcricutcircle-2.png
     Good morning from the Cricut Diva Mary! I trust you are finally enjoying some Springtime weather. I didn't think Winter would ever end, lol. Today a have a wonderful card to share with you using the French Manor cartridge and my Expression machine. I used the Cricut Craft Room to design this card for my Mom's 88th birthday. She loves birds so I thought I'd make a real fancy one: a peacock.

Image
   
 I used the peacock image cut @ 4" from page 46 in the booklet and then inked the edges a bit. I cut the layer 2 times. One was cut using blue, the other in green. I like to ink my edges while it is still on the mat. It makes it easier to ink all edges with the paper still around the image. I remove the excess card stock after it is inked.

Image
    
The base is from the same cart but on page 35 with the feature Card 2. I cut it @ 5.50". I used CCR in order to make sure the peacock fit in the frame. CCR is an awesome program. Even though I have the Gypsy, I like the fact that it is on a larger screen in the CCR, so it is easier to see that your placement is correct. I do use the mat feature so the card is on one layer and I just go to my second mat for the Peacock.

Cricut Diva Peacock Card 007

     After building the layers, it was now time to decorate it up. This is nice but not outstanding, yet. Just a tip for you: when gluing small pieces like the feather tips, I use a quickie glue pen by Sakura. It has a ball point tip so it is easy to apply the glue without getting it all over the place.

???????????????????????????????

     Can you tell I love Liquid Pearls and Stickles? Now this peacock is styling!!! I also added a bow from 3girlsjam, some pearls and an angel stick pin from Pinque Peacock Shop. Be on the lookout for a wreath for Mom following this same theme.
     I hope you have enjoyed my card today. I have already given this to my Mom and I am happy to report she loved it!!!!

Friday, November 2, 2012

     November 100 Cart Blog Hop Day One


     Welcome to Erica's November 100 Cart Blog Hop. Can you believe it is November already? Where on earth has this year gone???  
     Each month Ericas' Design Team uses over 100 different Cricut Cartridges in their projects during the two days of this hop. Be sure to check out each members blog for some major crafting ideas. We hope to inspire you to get a head start on your Holiday projects.
      You should have come from Kathy Salido if not, then you want to start from the beginning @ My Cricut Craft Room  Be sure to hop along and leave some love on each of the blogs for a chance to win some goodies. We love to hear from you.
     This month our theme is Winter/ Holiday related. When I first signed up I missed the part about winter theme so I chose these 4 carts for my project: Girls Makeup Party,French Manor, Handyman and the Imagine cart Greeting Cards Inside and Out. What on earth was I going to do now? With a few suggestions from my DT sisters I came up with this:
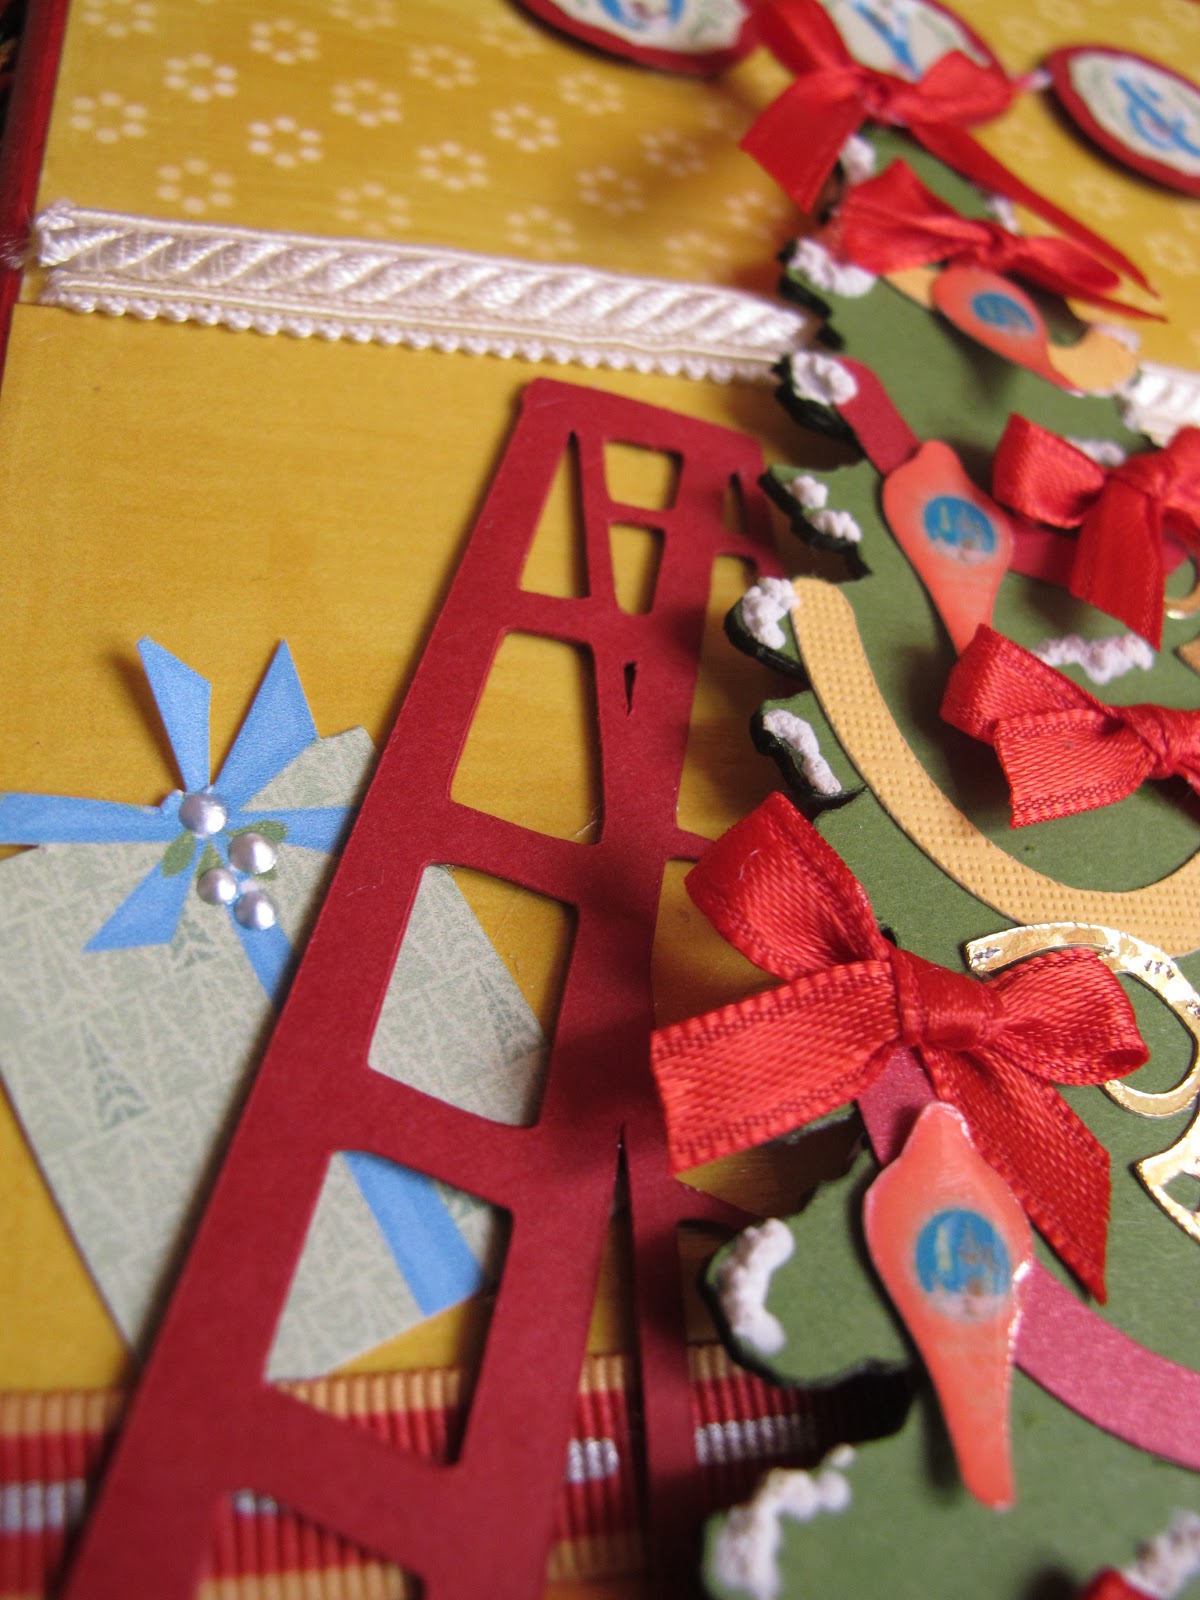
     I just love how this wall plaque came out! The stockings hung by the chimney, the ladder still out to finish decorating, the presents all wrapped and of course, hot cocoa and cookies waiting for Santa. Now let me show you how this finished project is really recycled from a previous project I had started and had discarded.
     For September's Blog Hop I had made a wine plaque. The finished project came out great but I had originally started with this canvas and really made a mess of things. I had put this aside and made my final project on a canvas board. However I did not want to waste a canvas. To start this project I lightly sanded this canvas and covered it over with 2 coats of Gesso and painted around the edges with a red paint. I am so determined to use up scraps that I separated all of them into color families and placed them in clear sheet protectors. I promised myself that all the embellishments had to be made from these scraps.To save time here (you would need a carafe of coffee to get through this post,lol), I'll give you the names of the carts and cut sizes to speed things up a bit.
     Let's start with the background. I am so sad that Provo craft is no longer going to produce the Imagine. I for one use it all the time. I love how I can coordinate all my papers for a truly original look. For this project alone I used 5 Imagine carts and was able to make a project that is an original of mine. I used the patterned paper on page 43 of Greeting cards Inside and Out for the upper wall paper and a solid for the bottom. I separated these with some white braid for a molding effect. For the floor I used George basic shapes for a 2 x 9.75" rectangle and flood filled it with the wood pattern from Snapshot:Everyday on page 4. I had a ribbon that went perfect for the base board. 

     Table1.7" page 33 French Manor glossy accents for table top
     Chair 2.5" page 28 French Manor cut 2, 1 is to cut apart and emboss to get chair cushion.
     Cookies and Cocoa Kate's Kitchen pg. 10 use separate layers to get cookies and plate, size @
       1.7 "then   combine these layers. Cocoa cup is on page 17 and also @ 1.7".
     Fireplace Joy Of The Seasons page 55 @ 2.5"I did all layers. The fire was also embellished with 3  shades of stickles for a roaring fire effect. (This is so cool!). The stockings are from Santas Village. I believe these are cut @ 1" sorry I do not have the exact measurement since these were leftovers from a project last year.
     The wreathe is from JOTS on page 66 and all layers were cut @ 1.5". I used a small mirror tile that I adhered to the canvas and then used pop dots to raise it up above the level of the mirror. Then I just added a few red stickles and a nice red bow.
     The ladder was cut 3 times from the image on Handy Man Lite cart @ 4". This made it real sturdy. The tree itself is from 'Tis The Season on page 39 of the hand book. I cut 2 from chipboard @ 6" and 1 from green card stock. After I glued these together I used a snow marker by Marvy to create a snow effect on the branches.This stuff gives a great 3D effect. You just add it to a project then heat it with a heat gun and puff, instant dimension!!! Erica was kind enough to send me some and I am now hooked.
The presents are from Snow Angel Imagine cart on page 17 and the ornaments are on page 2 and were print and cut @ .75". I love to add bows to my trees so why should a faux tree be any different, lol.
  The image is on page28 of Snow Angel and I separated the layers so I could have the individual letters to work with. I can't believe I forgot to write down the size of the banner but I think they were at .75". I used a circle punch to add a red banner for the letters to rest on and used some red twine I had received from Erica to string them with. Then I added some snow marker. (I love this stuff!!!!).
     My final project is a gift idea for the holidays using Girls Makeup Party:
          I had made this for my grand daughters 6th birthday. She is such a girlie girlie,lol!!! I bought a clear gallon pail @ Michaels and decided to make a bathroom tote for her. I cut the "Girls Night" @ 2" from Girls Makeup Party on page 19 in hot pink vinyl. The brown label is from French Manor on page 68. I used the border shift function.I first applied the brown label and then the letters over it. All I had left to do was to add some ribbons and a flower and Voila, you have a girlie presentation. I filled this with a towel wrap and plenty of bath fizz balls. Needless to say it was a huge hit!
      Now it is time to head over to Nadja's and see what  creative projects she has to show you. Should you get lost along the way here is the line up:

SATURDAY

  1. MCCR http://mycricutcraftroom.blogspot.com
  2. Kathy S http://3spoileddogs.blogspot.com
  3. Mary http://Mary-fortheloveofart.blogspot.com
  4. Nadja http://nadjarobbins.blogspot.com
  5. Miranda http://www.nanasscrapspot.com
  6. Shelley http://shelley-scrapbookingforfun.blogspot.com
  7. Lisa Chamberlain http://lisacustomscrapbooking.blogspot.com
  8. Janet http://janetscreativeworld.blogspot.com
  9. Lisa Carrier http://ourcraftingcorner.blogspot.com
  10. Sharon  http://www.simplysweetbysharon.blogspot.com
  11. Tammy S http://www.Cuttinandstampin.blogspot.com
  12. Jessica S http://jessicascraftshaque.blogspot.com
  13. Erica’s Blog Candy http://ericasblogcandy.blogspot.com


Wednesday, October 27, 2010

Creativity Begins Here!

Creativity Begins Here

    This months challenge for the Circle members was to make something expressing your love of creating, this is what I came up with.
    I had wanted to make something for my craft room and like many of you, I have an abundance of supplies. Sometimes I forget all the neat products I own so I decided to make a wall plaque to use as a creative jumping off point.
    First I used some wall vinyl and made the word "Creativity" using gypsy font cut at 4". This is such a beautiful font with intricate detail in the fonts (so creative, lol). Then I used my gypsy to weld the words "begins here" using "Opposites Attract" @ height of 2.25.
   Now for my Creative Board. Where do I begin? First I used a 12"x12" piece of printed paper and adhered that to same size chipboard that was painted on the back side. I then made a glimmer mist using Distress Inks and Perfect Pearls. Once it was dry I distressed the edges with my Distrezz It All and inked the edges then punched the top edge with my Bind It All.
The creative ideas was cut also with Gypsy Font using both shadow and upright feature. I used both solid card stock and print and reversed them for top and bottom of board.
The dress form was cut @ 3.50" with the French Manor cartridge. For this cut I used Grunge Paper by Tim Holtz and used his black dabber paint . I finished the "dress" with a small prima flower and small rhinestone. It is adhered to a spellbinders oval that is embossed with one of the folders from the Asian bundle using my Cuttle bug, of course the edges were inked!
The small velum envelope with tag was a perfect way to showcase my brads. It was cut using Fabulous Findings@ 2.48x 2.32 for the insert. I know the lattice was cut using French Manor but I can"t remember the details of my butterfly. (I cut and stickled it a while ago and found it in my stash while doing this project, lol.
I have been taking classes at My Creative Classroom so I had to incorporate a few techniques. One was the memory frame that is stamped "Laugh" and uses alcohol inks for the background. I used Plantin School book in for my "vintage" flowers that were cut @ various sizes and has a rhinestone center.
The Just A Note was cut using Imagine More and then inked. I finished the whole project off with some Jolee embellishments (paint tubes, apron, palette etc.) and of course some beautiful ribbon.
Although this project was a lot of work, every time I look at it I smile so I guess it was worth the time and effort. I hope this has somewhat inspired you!


Sunday, October 17, 2010

Fun Flock Lion


   I just love this card! The challenge for the week @ Cricut Circle Blog was to create something with rich fall colors. The palette was gray, orange, burgundy and brown. You also had to use at least 2 cuts and add texture. That's right at my alley!
   I started with my French Manor cartridge and cut the lion "door knocker" out of tan and chocolate brown card stock. Then I ran it through the xyron both side. After layering the pieces I added fun flock for the lions mane and chalk for his features, and a small piece of metallic gray card stock for the mouth and eyes.
   The medallion is also from French Manor. I used the negative pieces as well to accent the greeting.
   The base of the card is layered with tan, brown and orange card stock. I embossed the top piece with a folder from the Asian bundle and ran it through my CB. The greeting is from a M's stamp in the dollar bin and layered on burgundy card stock.
 

Thursday, October 7, 2010

French Manor


   What a wonderful cartridge French manor is! I finally got around to using this and boy does it help you get creative. First I started with my cricut Imagine and chose my background paper  using Imagine more cart and used Plantin Schoolbook for my card base. I love to use PS for cards because I love the dotted lines on the bottom. I also cut the frame from Imagine More but then added Tim Holtz crackle paint to the frame and distress it. The card base was distressed with the Distrezz It All for a nice grungy feel.
   Bet you can't guess where the curtains came from. Ok, it's from Paper Doll Dress Up. Yup, I used the headress layer with pig tails cut at 4" and cut them apart to make them look like curtains with a swag. Since I cut them out of glitter card stock I guess they don't look too much like hair huh?
   Next I got to use grunge paper for the first time. Oh do I love this stuff!!! The Imagine cuts it like butter and really makes the details stand out. I did the same with the "mirror". The dress form was painted gold with Ranger dabbers but the mirror was cut in black with the print and cut feature on the Imagine. For the mirror I covered it with foil tape.
   I finished it off with prima flowers, pearls for a necklace and of course a touch of ribbon and MS punch for the leaves. I know the person who is going to receive this is going to LOVE it!!!