Showing posts with label Santas Village. Show all posts

Friday, November 30, 2012


     Welcome to My Cricut Craft Room's 100 Cart Blog Hop! If you have come from Erica's Projects then you are in the right place, if not then you want to start at the beginning HERE so you don't miss a thing.. Each month the Design Team shows you projects made using 100 Cricut cartridges. We hope to inspire you to dig out those carts or help you to explore the possibilities on carts you already own. Hey you might even find one to add to your Christmas or Chanukah wish list. As a member of Erica's team, I have chosen to use the following 4 cartridges: Handy Man, Hello Kitty, Very Merry Tags and the Imagine cart Santas' Village.
     December is party month in our house. Next to October it is one of our busiest Birthday months. We have 6 birthdays this month. They are on the 7th, 13th, 19th, 22nd, 28th and 31st. My oldest child will be 39 on the 22nd and I came home from the hospital Christmas Day so it is always a special day for me in more ways than one! So I chose to make 2 Birthday cards as well as 2 Christmas projects for you so let's get started.


     My first project was a birthday card for one of my grand sons who is turning 6. I used Handy Man to make this tape measure and cut all layers @ 1.75".
     
      I used some silver card stock on this which looks awesome in person. I used a black gel pen to mark all the increments on the die cut.
     I used some screw brads for the corners and mounted it on robot paper since he loves Transformers. I finished up with a stamp by Pink By Design called "Tool Time".
     My next birthday card is a snowman shaped card for my grand daughter who turns 3 on Dec. 28th. Wanna see???
     Isn't she cute??? Believe it or not, this snowman was in Hello Kitty. I used my gypsy to weld the image into a shaped card. This was sized @ 5".
     I actually welded 2 snowmen together and cut an extra without welding for the top layer. Of course I had to use cinnamon stickles for a little sparkle!
     Oh yeah, more stickles, some chalk blush and , of course, the wonderful winter stamp by Pink By Design stamps again. I think her hat and scarf came out so adorable with the glittered card stock. Are you ready for my favorite Christmas project this season? Have you ever wondered how Santa comes in if you don't have a chimney? How about a Magic Key?
     I found this key @ Michael's and wanted to do something special with it. I found a wonderful story on the internet.....
     So now I needed to design something to store it in. I had some small plain boxes so I decided to alter it like this:
     I used George Basic shapes and  Santas Village in the CCR to design a circle and then place the image from page 5 in the center of the circle. All I had to do was to use my Imagine, print and cut and Voila a sticker image! I finished it all off by layering some green and red card stock and added some liquid pearls for dimension. I have already sold quite a few!
     My final project is the tags I plan to use on my gifts for the guys this year. I used Very Merry Tags to create these.
     I cut these @ 3". This reindeer is the negative cut from the image. I cut all the solid tags from Kraft card stock and then used the main cut and negative pieces so I get 2 tags from one cut! I added some snow to the bottom of the tag with a snow cap marker by Marvy. Once you heat it, it puffs up!!! I used a glaze marker to add an eye and some stitching around the edge. I finished it off with a small jingle bell.
     Whew, that was a long post. I hope you gained a little inspiration from me today. Now head over to Liz and see what enchanting projects she has designed to thrill you with! Be sure to start at the beginning and leave some blog love for each of our designers. Just in case you get lost along the way, here is the complete line up:

My Cricut Craft Room http://mycricutcraftroom.blogspot.com/
Jen L http://www.mybusycraftylife.blogspot.com/
Shelley http://shelley-scrapbookingforfun.blogspot.com/


Friday, November 2, 2012

     November 100 Cart Blog Hop Day One


     Welcome to Erica's November 100 Cart Blog Hop. Can you believe it is November already? Where on earth has this year gone???  
     Each month Ericas' Design Team uses over 100 different Cricut Cartridges in their projects during the two days of this hop. Be sure to check out each members blog for some major crafting ideas. We hope to inspire you to get a head start on your Holiday projects.
      You should have come from Kathy Salido if not, then you want to start from the beginning @ My Cricut Craft Room  Be sure to hop along and leave some love on each of the blogs for a chance to win some goodies. We love to hear from you.
     This month our theme is Winter/ Holiday related. When I first signed up I missed the part about winter theme so I chose these 4 carts for my project: Girls Makeup Party,French Manor, Handyman and the Imagine cart Greeting Cards Inside and Out. What on earth was I going to do now? With a few suggestions from my DT sisters I came up with this:
     I just love how this wall plaque came out! The stockings hung by the chimney, the ladder still out to finish decorating, the presents all wrapped and of course, hot cocoa and cookies waiting for Santa. Now let me show you how this finished project is really recycled from a previous project I had started and had discarded.
     For September's Blog Hop I had made a wine plaque. The finished project came out great but I had originally started with this canvas and really made a mess of things. I had put this aside and made my final project on a canvas board. However I did not want to waste a canvas. To start this project I lightly sanded this canvas and covered it over with 2 coats of Gesso and painted around the edges with a red paint. I am so determined to use up scraps that I separated all of them into color families and placed them in clear sheet protectors. I promised myself that all the embellishments had to be made from these scraps.To save time here (you would need a carafe of coffee to get through this post,lol), I'll give you the names of the carts and cut sizes to speed things up a bit.
     Let's start with the background. I am so sad that Provo craft is no longer going to produce the Imagine. I for one use it all the time. I love how I can coordinate all my papers for a truly original look. For this project alone I used 5 Imagine carts and was able to make a project that is an original of mine. I used the patterned paper on page 43 of Greeting cards Inside and Out for the upper wall paper and a solid for the bottom. I separated these with some white braid for a molding effect. For the floor I used George basic shapes for a 2 x 9.75" rectangle and flood filled it with the wood pattern from Snapshot:Everyday on page 4. I had a ribbon that went perfect for the base board. 

     Table1.7" page 33 French Manor glossy accents for table top
     Chair 2.5" page 28 French Manor cut 2, 1 is to cut apart and emboss to get chair cushion.
     Cookies and Cocoa Kate's Kitchen pg. 10 use separate layers to get cookies and plate, size @
       1.7 "then   combine these layers. Cocoa cup is on page 17 and also @ 1.7".
     Fireplace Joy Of The Seasons page 55 @ 2.5"I did all layers. The fire was also embellished with 3  shades of stickles for a roaring fire effect. (This is so cool!). The stockings are from Santas Village. I believe these are cut @ 1" sorry I do not have the exact measurement since these were leftovers from a project last year.
     The wreathe is from JOTS on page 66 and all layers were cut @ 1.5". I used a small mirror tile that I adhered to the canvas and then used pop dots to raise it up above the level of the mirror. Then I just added a few red stickles and a nice red bow.
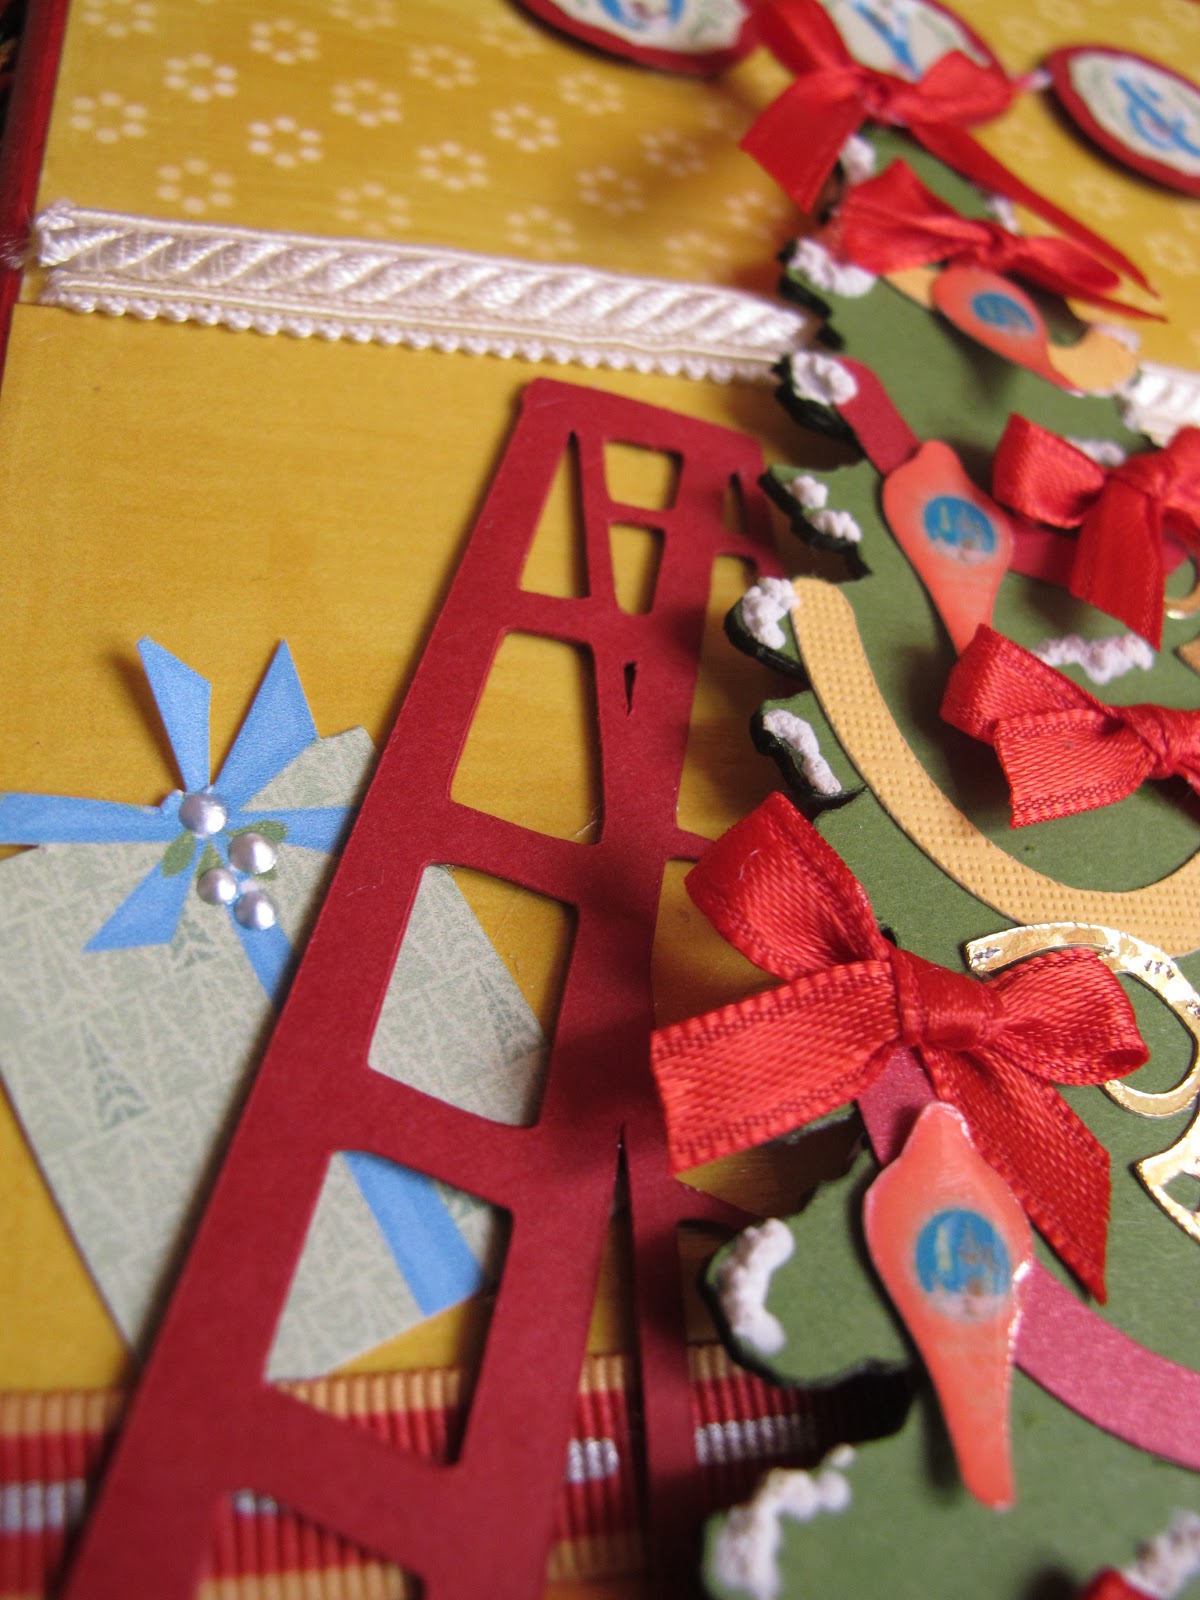
     The ladder was cut 3 times from the image on Handy Man Lite cart @ 4". This made it real sturdy. The tree itself is from 'Tis The Season on page 39 of the hand book. I cut 2 from chipboard @ 6" and 1 from green card stock. After I glued these together I used a snow marker by Marvy to create a snow effect on the branches.This stuff gives a great 3D effect. You just add it to a project then heat it with a heat gun and puff, instant dimension!!! Erica was kind enough to send me some and I am now hooked.
The presents are from Snow Angel Imagine cart on page 17 and the ornaments are on page 2 and were print and cut @ .75". I love to add bows to my trees so why should a faux tree be any different, lol.
  The image is on page28 of Snow Angel and I separated the layers so I could have the individual letters to work with. I can't believe I forgot to write down the size of the banner but I think they were at .75". I used a circle punch to add a red banner for the letters to rest on and used some red twine I had received from Erica to string them with. Then I added some snow marker. (I love this stuff!!!!).
     My final project is a gift idea for the holidays using Girls Makeup Party:
          I had made this for my grand daughters 6th birthday. She is such a girlie girlie,lol!!! I bought a clear gallon pail @ Michaels and decided to make a bathroom tote for her. I cut the "Girls Night" @ 2" from Girls Makeup Party on page 19 in hot pink vinyl. The brown label is from French Manor on page 68. I used the border shift function.I first applied the brown label and then the letters over it. All I had left to do was to add some ribbons and a flower and Voila, you have a girlie presentation. I filled this with a towel wrap and plenty of bath fizz balls. Needless to say it was a huge hit!
      Now it is time to head over to Nadja's and see what  creative projects she has to show you. Should you get lost along the way here is the line up:

SATURDAY

  1. MCCR http://mycricutcraftroom.blogspot.com
  2. Kathy S http://3spoileddogs.blogspot.com
  3. Mary http://Mary-fortheloveofart.blogspot.com
  4. Nadja http://nadjarobbins.blogspot.com
  5. Miranda http://www.nanasscrapspot.com
  6. Shelley http://shelley-scrapbookingforfun.blogspot.com
  7. Lisa Chamberlain http://lisacustomscrapbooking.blogspot.com
  8. Janet http://janetscreativeworld.blogspot.com
  9. Lisa Carrier http://ourcraftingcorner.blogspot.com
  10. Sharon  http://www.simplysweetbysharon.blogspot.com
  11. Tammy S http://www.Cuttinandstampin.blogspot.com
  12. Jessica S http://jessicascraftshaque.blogspot.com
  13. Erica’s Blog Candy http://ericasblogcandy.blogspot.com


Saturday, August 4, 2012

Erica's 100 Cart Blog Hop


August 100 Cartridge Hop Line up


Welcome to Erica's Craft Room
100 Cricut Cartridge Blog Hop Day TWO

You should have started at http://mycricutcraftroom.blogspot.com/ if not please start at the
 beginning


Welcome to My Cricut Craft Room's August 100 Cartridge Blog Hop

Collectively the design team uses over 100 different Cricut Cartridges in their projects during 


the two days of this hop. Sunday the new members of the design team will be announced 


and some have even made a project to share with you!! What an exciting weekend!!

As special treat enjoy 10% off of your total purchase with Erica's Craft Room Store.
Use the code AUGUST to see 10% off of your total purchase (No exclusions)


     Welcome to My Cricut Craft Room and our monthly hop. If you just came from Janet's 
 http://janetscreativeworld.blogspot.com/   then you are in the right place 
Each month the  Design Team make projects using at least 3 Cricut cartridges.
This is a fabulous way for you to view all kinds of paper crafting using great dies cuts
from these cartridges. I used 3 different Imagine carts:

Lori's Garden, Greeting Cards Inside And Out and finally, Santa's Village. 


     Since we have been watching the Olympics I thought I would make some prize
 bags for 2 of my grandchildren who complete swim lessons this week.

     This actually started as a card from Greeting Cards Inside And Out. 
The trophy card  is on page 19 of the handbook and cut it @ 4.2".
I used the images on page 21 with the layers separate. 
The finger was cut @ 5" and the labels @ 3.5".  I also added some glossy accents
to the trophy to add a little shine. The no. 1 was also  raised up with a pop dot.

Okay, so I am not giving them a medal but I am giving them googles and 
diving sticks to practice their skills.I'm not sure we have Olympic swimmers 
but their baby sister is showing great promise as a gymnast!
     My next project is a card I made using Lori's garden. Can I just say
how much I love this cart?  It has to be the greatest Imagine cart there is. 
I used the birdcage on page 3 using the cut and print feature @ 2" on off white 
or cream card stock.I also cut the branch from page 31 @ 1.3".


 I inked the edges of my card stock with frayed burlap and faded jeans distress inks.  
Of course I needed to do some embossing so I used a cuttlebug border. I decided to use the recessed
part rather than the raised edge. Just call it creative licence, lol.

     Now for the fun part. I used some white and opaque Liquid Pearls to the birdcage 
as well as frosted Aqua and green Smooch.

     I used some Cinnamon Stickles for the flower centers and finally the sentiment from
 PBD Stamps. This sentiment is from their "Grandparents" set.
     My finally project is from the Imagine cart Santa's Village. Every year on Christmas Eve 
we gather the youngsters to go outside and sprinkle reindeer food so Santa's sleigh won't miss us! 
I thought I'd get a head  start and make some cute "boxes" to put the food in. 
     I started with the pillow box from Girl's Make-Up Party. The image I used was  
which I sized  @ 3.5". This striped printed background paper is from Santa's Village 
on page 36. Print, cut=done! I then used the reindeer tag on page 32 @ 2". I wanted a vintage look
so I inked the edges with tea Dye distress ink.
Before I adhered the tag, I used some red satin ribbon to tie it closed and added a bell so
the reindeer will hear us.
     I'll wait until we get close to the holidays and then mix up some reindeer food: oats, sugar and (of course)
glitter so it sparkles!!!
         I hope you have enjoyed my projects for this Hop. Be sure to stop over at Erica's Store to get in 
on the deals. Next you want to head over to the lovely Lisa:
                                 http://lisacustomscrapbooking.blogspot.com 
to see her amazing projects. Here's the line up in case you get lost along the way:


Sunday, December 4, 2011

Ornament Boxes

Christmas Ornament Boxes

     Well have I ever been busy, lol. Along with trying to do Christmas shopping, filling ornament orders and doing Birthday shopping/baking, I haven't forgot I had promised to show you the packaging my ornaments come in.
     First I ordered some clears boxes from www.clearbags.com. These turned out to be the perfect size but, they needed something to hold the ornament in place. I hope you realize by now that there isn't anything you can't do with a Cricut! I used the Sweet Tooth Boxes cart and used a cupcake holder cut at 6.75. The patterned paper was done using Santas Village cart and I even made a matching tag. I just love how the Imagine can resize the images to the appropriate size object so everything is proportionate! One thing if you plan on making these is to use a sturdy cardstock for the base.
     We have 6 December birthday's (ughhh!) so I finally bought a Cricut Cake to kind of help me out yet I haven't had a chance to play yet. This week I have to dive in so I'll post pics on how I do, wish me luck!!!
     Also Tim Holtz is in full swing with his 12 tags of Christmas and can I just say WOW! I hope to complete a few and I'll definitely share these gems as soon as I finish. I think it's going to be a creative week!!!

Monday, November 14, 2011

Mr. And Mrs. Claus Ornaments

     I am totally in love with the new ProvoCraft cartridge Santa's Village. When I first saw this cart I was in awe of the fantastic images and rich colors in the graphics. I knew I wanted to make some ornaments and it has taken me a while to figure out how to transform what I have in my head onto the glass ornaments!
     I tried waterslide decals but I was not happy with the results. They looked like a sticker I put on glass. That is definitely not my style, lol. I tried doing the images on card stock but I was not happy with that attempt as well. Sometimes my ideas just pop in my head will I'm in the shower and that is what happened this time. Finally, success!!! Okay, okay here are the pics and details. Without further ado: Tada......
     Isn't he fabulous? Believe me the picture does not do him justice! I started with clear glass ornaments that have a flat front. I stocked up with them several years ago @ M's end of the year sale. I used beacon's Glitter It! glue and Martha Stewarts Glitter to finish the inside of the ball and to set the stage for my design.
     I finally realized the I could use the printable vinyl that came with my Imagine cricut machine to print my artwork. Brilliant idea! I cut it at 1.6" and found it was the perfect size for my ornament. I then just cut a plain circle out of the vinyl and layered the image in the middle. Once it was afixed to the glass ball I used Triple Thick Gloss Glaze by Americana on top of the image and let it dry overnight. I had tried other finishes but they had a tendency to pool or drip of the edges. Some of the finishes needed more than one coat or were not thick enough for what I wanted to accomplish. This finish was perfect.
     One note about this finish is that youhave to brush it on. I globbed it on and it does have a few air bubbles doing it this way. However it seems to give it some character with the air bubbles, almost like it is snowing. Wait a minute, why not make it snow? I pulled out some stickles and added some to create the illusion that it is snowing! Another great idea!!!! I used a gold cording to hang the ornament with and voila, it's done.

     Aren't these just adorable? You have Santa, Mrs. Claus, the Toy Shop and there are images to use for penguins, trains, rocking horses, reindeer etc. the possibilities are endless. I will be adding these to my etsy shop as soon as I figure out the shipping, lol. Hope you enjoy these and don't be afraid to leave a comment and tell me what you think!