Showing posts with label ProvoCraft. Show all posts

Monday, February 18, 2013

A New Beginning As a Pinquette!

Today's Deals on Cricut.com
     Good morning ladies and fellow crafters. Take a look around, do you see anything new? Come on my announcement is here for all to see. Didn't see it yet? Look at the right side bar. There ya go, lol. I am thrilled to now officially announce that I have joined an outstanding group of overly talented ladies. After being on another Design Team for over a year, I decided I needed a change. Don't get me wrong, I enjoyed my time on the other team and learned a lot but I was thrilled when the opportunity arose to apply for a position with the Pinque Peacocks owned by Jessica Shelton-Buffa a fellow crafter with an amazing on-line store. She and my fellow DT sisters welcomed me with open arms. I am so lucky to be with some old friends and look forward to making some new ones on this Team. Wait until you see the talent over here. O My Gosh!!! This is just so exciting for me.
     For those of you who have come to my "home" for the first time let me fill you in on a few facts. I am a wife for (almost) 40 years, mother to 5 grown adults ( there is a set of twin ladies in there) and Mema to the most beautiful, talented, awe inspiring 8 grandchildren (3 girls, 5 boys).I retired from nursing (I was a Labor & Delivery room R.N.) when my second child was born. ( Thank God 'cuz the twins followed about 2 1/2 years later. I sewed dance costumes, prom dresses etc to help pay for extra activities for our growing family. My therapy was to take all kinds of craft classes, tole painting, ceramics (my least favorite medium BTW), advanced sewing classes, both Copic Certification classes, flower arranging etc, etc. As you can see I love crafts. These skills have helped me to work as a floral designer for the last 12 years and boy was that handy with weddings, showers, christenings and all kinds of parties. I recently retired since my back will no longer let me, lol.
     Okay that's enough about me. This new DT has given me the opportunity to create what I want, when I want and in whatever medium I choose. The Pinque Peacock has THE most fabulous products from flowers, to stick pins to fabric covered buttons as well as gorgeous stretch bracelets.You can find their products HERE  This link takes you directly to the product page. Click on a picture and feast your eyes on the yumminess, lol. 
     I thought I would share a card I made with you today. Hey, this is a crafting blog so I don't want to disappoint you, lol. Before I share this please envision how great this would be with a PP flower. I do not have any in yet but rest assured future projects will be loaded with goodies!
     My base for this card is from My Minds' Eye Life Stories "Roses" pattern. I grabbed a piece of good quality cream card stock and embossed it with a cuttlebug folder. I found the heavier card stock gives a great embossing effect. Next up the flowers.
     I used Flower Shoppe to cut my flowers with the image on page 14. I also used a Spellbinders to cut the leaves. I wanted to add some "Drama" to the card so some of the leaves are out of black glitter card stock. I have these great rhinestones and this one was perfect for the card.
     I have a lot of little pieces of lace from former projects (I don't throw anything out, lol. Glad I didn't!). I just wove a narrow pink satin ribbon through the lace. Stamped a nice sentiment and, Voila, I have a great card. I'll probably use this for a wedding.
     There you have it, my first post as a Pinquette! I hope you have enjoyed my Bio as well as my first project. Be sure to come back on Friday as that is the start of our 3 Day Irish Blog Hop. You'll all be dancing the jig for sure!!! Have a fabulous week my lovelies.


Wednesday, February 13, 2013

Just Sew!

Give Them Something From the Heart This Valentine's Day - Buy a Cricut!
  
      Happy Valentines' Day and  welcome to another fun Theme Day@ My Cricut Craft Room! Today Erica asked us to use the theme "Just Do It" so I decided to showcase a craft I love and have the opportunity to pass on to my grand daughters: Sewing!!! For Christmas I bought my oldest 2 GD's their very own sewing machines so we spent some quality time learning how to use it. I decided to make a layout to capture this major milestone. (I think so anyways, lol).
Mia, Cecilia and Alexis

Just Do It!!!
     The above picture shows Mia with her machine and she was just too excited to learn. To make this lay out I started by making my own background paper by using the Imagine Cart Heirloom. This paper pattern can be found on page 10. I flood filled it but decided to trim all edges by 1/2" on all sides and adhered it to a solid background paper. What a fun paper to work with! Let me break down the elements I added.
     This frame is on the Imagine More cart on page 12. I print and cut @ 2.5" however I also separated the layers so I could use the spools of thread. The spools had to be resized to 3.5" since I wanted to use them separately and not just to layer on the frame.I also wrapped some thread around the spool to give it a realistic look. I also layered this on a chevron paper for the background. Just a word about the journaling, I always write it in pencil first and then go over with ink so I don't have to worry about making a mistake. After the ink is dry I just erase the pencil marks.
     These are the extra threads I added to fill some white space. The buttons are a Tim Holtz embellishment as well as the card with hooks.I love to add dimension to my projects so I added some satin braid and I-Rock studs to the corset.
     In order to balance out this page, I took some of the pics I had taken and used them as "buttons" to fill the top "white" space. I lovehow this looks and plan to use this on more future LO's. By the way, this is the sewing machine I bought my GD's. It's by Michey and is the perfect size and model for these girls. They are 6 and 8 years old and this is perfect for them!
      I thought this would be perfect for this page. The graphic is from Word Collage but I used the color palette from Heirloom so I knew it would match. The graphic was cut and printed @ 3".
     I never realized there were so many images to choose from on my Cricut carts, lol. This phrase is from Nursery Rhymes and I cut it @ 2.5" then added some Distress Inks. I also pulled out some of my button brads. How can you possibly sew without scissors?
     Oh look, there were some on Cricut Everyday cart!!! I cut all the layers with different colors and added a brad for the "screw" on the scissors. I think I cut these at 1.75".
    Well there you have it , I just immortalized my cuties with their first step into sewing!!! Cecilia is the youngest one but it looks like she was really taking it all in. What did they make you ask? Pants for their American Girl dolls of course and they did a fabulous job for the first time!
     That's all for my project for today. Be sure to hop back over to My Cricut Craft Room and see what other surprises we have for you. By the way: Happy Love Day!!!!!!
     You can see the machine they are using Michley LSS-505 Desktop Sewing Machine (Google Affiliate Ad)


Tuesday, February 5, 2013

Valentine Pop Holders

Provo Craft 457214 Cricut Imagine 12 in. x 12 in. Cutting Mat- (Google Affiliate Ad)580538_Holiday Banner 468 x 60

      Hello fellow crafters!!! I am so excited to share a fabulous project with you today. Erica @ My Cricut Craft Room has asked us on the Design Team  to make something from a cart that you would never think  of. That's what I love about WYEGW. I used the Imagine cart All Wrapped Up and Fabulous Finds to make a Valentine heart folder to hold a pop.Let's get started.
     These were so much fun to make. I started with the image on page 16 in the All Wrapped Up handbook. The amazing thing about the Imagine is the ability to change colors and patterns. I wanted a Valentine feel so I edited the pattern by separating the layers and used the papers on pages 38 and 39 after I had sized these @ 5.40". These measurements allow you to cut 4 on a 12x12 piece of card stock.  Now to figure out how to add a hole for the pop.
     After I scored the paper I just used a paper punch to make the hole on the back. It was easier to do this before putting the heart together with Tacky Tape. Next is to cover the heart cut out on the front of the holder.
     Here's to winking at you, lol! All I did was to cut a round circle of white card stock using a 1.5" paper punch then pulled out my Pink By Design Stamps set Laughy Taffy. (This is rapidly becoming my go to set.) I added some pink chalk for the cheeks and then glued it to the inside. Easy Peasey! Next up, I needed to have a tag to write on. Fabulous Finds to the rescue, again.
     After placing the pops in the "Holder" I cut a heart charm @2" from the image on page 92 using shadow plus shift. This is the perfect size for the "to" and "from" on the tag. What is so cute about these is the fact that they almost look like a Heart Flower. Here's how they look at a smaller version sized @ 5" and holding a Dum Dum pop:
     I made 24 for one of my grand daughters preschool class. The larger size holds a Tootsie Roll pop and I made 21 of them.
     I wanted to make a holder for a single pop (that's what I had in my head anyways, lol). However, it wasn't until I explored my Library of carts that I came up with this idea. It just goes to show you that with a handful of carts, you are limited only by your imagination!
     Be sure to head back over to My Cricut Craft Room where you will always find more inspiration. I hope you have a fabulous week.


Saturday, February 2, 2013

February 100 Cart Blog Hop And A Christmas Card Album

580538_Holiday Banner 468 x 60
 
Welcome to Erica's Craft Room
100 Cart Blog Hop   
      Welcome to another fabulous blog hop that Erica is kind enough to host.If you just came from Crafting Blog Events then you are in the right place. If not then you want to start in the beginning HERE  so you don't miss a thing.
     Each month the Design Team makes projects that showcase 100 Cricut cartridges. We hope to inspire you to pull out a cart you may not have fully explored or entice you to perhaps add to your library, hee hee! I can't believe it but it has been 1 year since I started on Erica's team. In case you don't already know what this is about let me fill you in. Each month we showcase 100 carts. We hope to inspire you to pull out those rarely used carts or to show you one you may not already own but give you a glimpse of what you can create. The carts I chose to use this month are:Mini Books,Frames Of Mind, Joys Of The Season, Seasonal Cake Art and the CCR exclusive cart Jewish Icons. Let's start with the Jewish Icons:
     The dove is cut @ 2.5" for the basic+shift+shadow. I used a glittered card stock for the dove layer. The "Shalom" was cut @ 1" for basic + shift. I love the softness of the background paper from DCWV. The flowers were some leftover ones I cut from Flower Shoppe and I believe they are @ 1.25". This would be a great card for Passover or Thinking Of You.
     Did you receive a lot of photo cards for Christmas?I always put them in a box with special Christmas cards I received and can't seem to part with.Well, after almost 40 years of marriage, 5 child, 8 grandchildren and many friends, I decided to do something I have always planned to do. I made a mini scrapbook to put them in. Let's take a look.
     First let's start with the cover. I used Mini Books for the cover and inner pages. I started with the image on page 14 . I cut 2 from chipboard and 4 from card stock. The Binding was cut @2.722 x 6.056".
     The frame is cut from Frames Of Mind and the image is on page 11 + @ 3.5".I cut a piece of red card stock to fit inside and embossed the sentiment with detail Gold embossing powder. I believe the sentiment is from Inkadinkado. The flower is a die cut I had leftover from another Christmas project.
     This label is on the inside of the cover. Its the star tag from Joys Of The Season on page 78 @ 2.5" including the layer.The numbers were cut from Seasonal Cake Art @ .75"and the "1" was cut at .65".
     Notice the snowflake back ground paper. Actually it is red card stock however, when I was gluing it on, I had a few glue spots that I didn't like. Rather than start over I had a brain storm, stamp it! Wow , what a way to save a project. I was so pleased with the result that I also did the same thing to the back inside cover. I'll have to remember this one, lol.
     Oh Shea is so cute peeking out at you! I cut the inside pages also from Mini Books and also on page 14. I used insert @ 8" x 5.25". I cut 6 of these since I had 12 photos to preserve. The snowflake embellishments are from Seasonal Cake Art page 44 and cut 1 of each @ .75", 1" and 1.25"
     Aren't these snowflakes just beautiful? These were cut from Joys Of The Season and can be found on page61 and layers @ 1.75".I also used some stickers throughout the album since it has been so long since I used any. You can find other versions on how to alter your page style, format and size with this cart. Be sure to check it out. The possibilities are endless!
 Cricut Mini Books. There you have it. I hope you will try this as it really is a great way to store those pics Now it is time to hop over to the adorable  Bella's and see what she has to show you.
     Here is the line up in case you get lost along the way:.

Start http://mycricutcraftroom.blogspot.com
Tami's project http://scrappinrabbitdesigns.blogspot.com
Crafting Blog Events- http://craftingblogevents.blogspot.com
Mary's Projects http://Mary-fortheloveofart.blogspot.com
Bella http://BellaandBaileysblog.blogspot.com
Robin http://cutonedesignsbyrobin.blogspot.com
Erica's Projects http://ericasprojects.blogspot.com
Sara http://itswhatkeepsmesane.blogspot.com/
Blog Candy- http://ericasblogcandy.blogspot.com
Owl About Kids- http://OwlAboutKids.blogspot.com


580538_Pink Cricut Expression Sale

Thursday, January 31, 2013

Let Freedom Ring

      Welcome friends and happy Friday! Today Erica asked us to make something relating to freedom. We were fortunate enough to spend the 4th of July surrounded by our whole family in Williamsburg Virginia. What a memorable trip this was. This was truly a highlight of our trip to be on the common surrounded by fellow Patriots watching the fife and drum corps march by.
     I took this opportunity to do a layout of my husband and I waiting for the fireworks to begin. First thing I did was to pull out my Stand And Salute cartridge.
     I don't usually like having my picture taken however this one really wasn't too bad, lol. I knew there was a bell on this cart but I was so surprised to find a border of bells as well as a border with the words "Let Freedom Ring".
     How cool is this? I started with some gold paper and cut my border @ 1.25" 3x's. I used 2 sets for the top of my layout and one for under the pic of us waving flags.I'll explain more about the distressed bells a little later. Since I am on a mission to use up my scrap paper, I used a strip of red card stock to off set my border. The star banner is from K&Company.
     This bell border is on the same page as the previous border: page 30. I again placed 3 sets of this border (also @ 1.25") however this time I used my gypsy and welded them together. Now the fun begins. I wanted the bells to look aged so I used some alcohol inks in Ginger, Rust and Gold. I kept adding the colors until I had them aged just right. The flag circles are also from K&Company.
     The hardest part of this project was picking out the papers. I kept moving the colors around to try and achieve a more aged look.
     This is such a fabulous cartridge.It is so good whether you are scrapping your pictures, using it for classroom projects or, how about sending some cards to our military? You can find some great images HERE
 There you have my project for today. Be sure to join us tomorrow for our February 100 Cart Blog Hop. You won't want to miss some really creative projects.
     Be sure to head back over to My Cricut Craft Room
) and see what the rest of the team has to share.


580538_Pink Cricut Expression Sale

Sunday, January 27, 2013

We Just Click

Get $100 OFF the Reconditioned Cricut Expression Machine!
     
     Good morning fellow crafters! I hope you all have warmed up a bit. I don't know about you but, here in the Northeast we have been gripped by a cold snap, brrrr!
     Today Erica asked the Design Team to create a project using a CCR exclusive cart. Provo Craft is sending the circle members (Yup I am one, lol) a new cart called Animal Antics. So we could get a chance to play before they send the cart out, they have been kind enough to add it to the CCR so today I decided to make a card using one of the images. I chose to use the penguin. Here it is....
     Isn't this just the cutest penguin you ever saw? I really love how jolly he looks and how about that camera? Let's start with the phrase. I chose the phrase feature for "We Just Click". I used the phrase feature + shift as well as the phrase shadow.
     The shadow was cut with red card stock, the phrase shift from silver and the phrase itself from black. This was all done @ 2.5" and went together really easy.Now for the cuteset penguin. Can you tell I love this little guy, lol?
     I think the part I love the best is the camera around his neck.This is just so cute with the phrase. All layers were cut @ 3.5". This was particularly helpful for the lens and flash on the camera. I added some liquid pearls for the "beak" and a metallic marker for the trim on the hat. This would be so cute as a birthday, friend or even Valentines' Day card.
     I thought I'd show you a screen shot from my CCR project:
This was from one layer. The left is the silver layer, right shadow layer in  red and the  lower right layer in black

This is what I started with before I decided to add another layer and cut things out separately. I like to see what the layers are for the cut before I move them around on my mat to place my colors. I hope this makes sense!


   Well that's it for today guys. Hope you enjoyed my little guy. I can see future projects with this cart!Be sure to head back over to My Cricut Craft Room and see what the rest of the team has to share with you today.


Cricut Expression 2 Blogger Bundle137790_Veterans & Service Members Get 10% Off at UnderArmour.com

Monday, January 7, 2013

Thank You Card


     Good morning my fellow crafters and welcome to all my new followers. I really appreciate your taking the time to follow me and hope that in some way I can inspire you. This year I am challenging myself to use some of my least (or never) used carts and really explore their potential.
     This week Erica @ My Cricut Craft Room asked us to create a Thank You card so I deided to pull my Sophie cart. Here's the cut from page 45 that I used:
     This is just 2 cuts. I love that it is such an easy card to make. I chose and cut  @ 2.50" for the top and the shadow @ 2.75" for a more layered look. the stamp is from Inkadinkadoo's Just Saying set.

     I also used Spellbinders Large Scalloped Ovals to provide another layer. The stamped label was then applied with pop dots. Since the background card had a touch of blue in it, I decided to add some ribbon and blue rhinestones to pull it all together. I had bought a set of premade cards from DCWV, so, when I am in a hurry or just want to focus on my die, I always go to this set.
     I used the blue rhinestones as the flower centers and also carried it over to the image already on the card base.
     Now pull out those less used carts and see what you can create! Thanks for stopping by and be sure to head back over to My Cricut Craft Room and see more inspiration from my DT Sisters.


Get the Cricut Expression 2 for ONLY $299.99!
New To Under Armour - The Under Armour Revolutionary ARMOUR BRA 137790_Free Next Day Shipping On Orders of $150 or More at Under Armour

Friday, January 4, 2013

Ericas January Blog Hop 2013


Welcome to Erica's Craft Room
100 Cricut Cartridge Blog Hop

You should have started at http://mycricutcraftroom.blogspot.com/ if not please start at the beginning

  
 Happy New Year and welcome to the first Hop of the New Year over @ My Cricut Craft Room. I hope you all made through the holidays and are ready to do some crafting. If you just came from Lisa's then you are in the right place. If not then you want to start at the beginning so you don't miss any of these fabulous projects.
     Each month the Design Team shows you 100 carts and many of the projects you can create with them. This month Erica asked us to use 5 different carts. I made mostly cards and a cute little box from the following carts: Victorian Romance, Paper Dolls teen Scene, Sweet Tooth Boxes, Hello kitty Greetings and Superman.
     Since I have 8 grandchildren I decided to use this month's hop and get a head start on some Valentines' Day projects.I hope this will give you some incentive to get going as well. So, let's get started:
     I plan to make some shaped cards this year to challenge myself  and I found the perfect one to start with on Hello Kitty Greetings. This image was found on page 51 using the card feature @ 3.25". I love the glittered card stock for the wings, however the heart had a few spaces I wasn't happy with so I decided to add some liquid pearls to the outline. The stamps are Pink By Design "Laughy Taffy". One of my grand daughters is going to love this!
     I was so excited to finally use this cart. This image is from Paper Dolls Teen Scene . The image is on page 27 and all the layers were cut @ 5". The image s-rain, s-rain s for the body was cut in black + shift body in cream. I used wardrobe layer 2 and wardrobe 2 for the clothing. I just love the skates and, since one of my grand daughters takes ice skating, I'm sure she will love this card.

I added some waterfall stickles to the edge of the skirt and some chalk from Pebbles, Inc for the cheeks. (It's pretty cold in those arenas, lol). She looks like she is holding a heart from the background paper. (Yes I planned it that way!).

I used some scrap pieces to make the background, added some faux stitching around the edge and I tag I had left over from last year.
     I love to make boxes for place settings as well as gifts so I had to make one for V-Day. Although I  have both the TBBM carts, I also love the ones on Sweet Tooth Boxes. You can find this one on page 21 + . I used the left over scraps from the above card to cut small squares to add to my box. The double heart cut out on the front of the box is from a punch.
     The insert of clear acrylic is from the blister pack my carts come from. I always cut them up to use for projects just like this! I decided to dress it up a little by adding ribbon to the inside and out of my lid.
     I thought it looked a little plain so I used a Martha Stewart Branch punch for the leaves and some Prima flowers with silver heart brads to add to the top of the box.
     Enough of the girlie stuff. Since I have 5 grandsons, I used Superman for an out of this world card.
     I LOVE how this came out. I haven't decided whether this will be for V-Day or a birthday but, either way it will work. This cut can be found on page 28 and I cut it @ 3.50". 
     The "POW" is under fonts and I cut it with the shadow @ 1" high. It was a silhouette cut yet I liked the bold inside cut so I went with that. The background paper I have had in my stash and acts like a mulberry paper. It adds so much with the embossed silver stars. Ready for some action?
     You guessed it. It is on an action wobble. These things are just so fabulous to work with. Now for my last project. I made both a boy and a girl version using Victorian Romance.

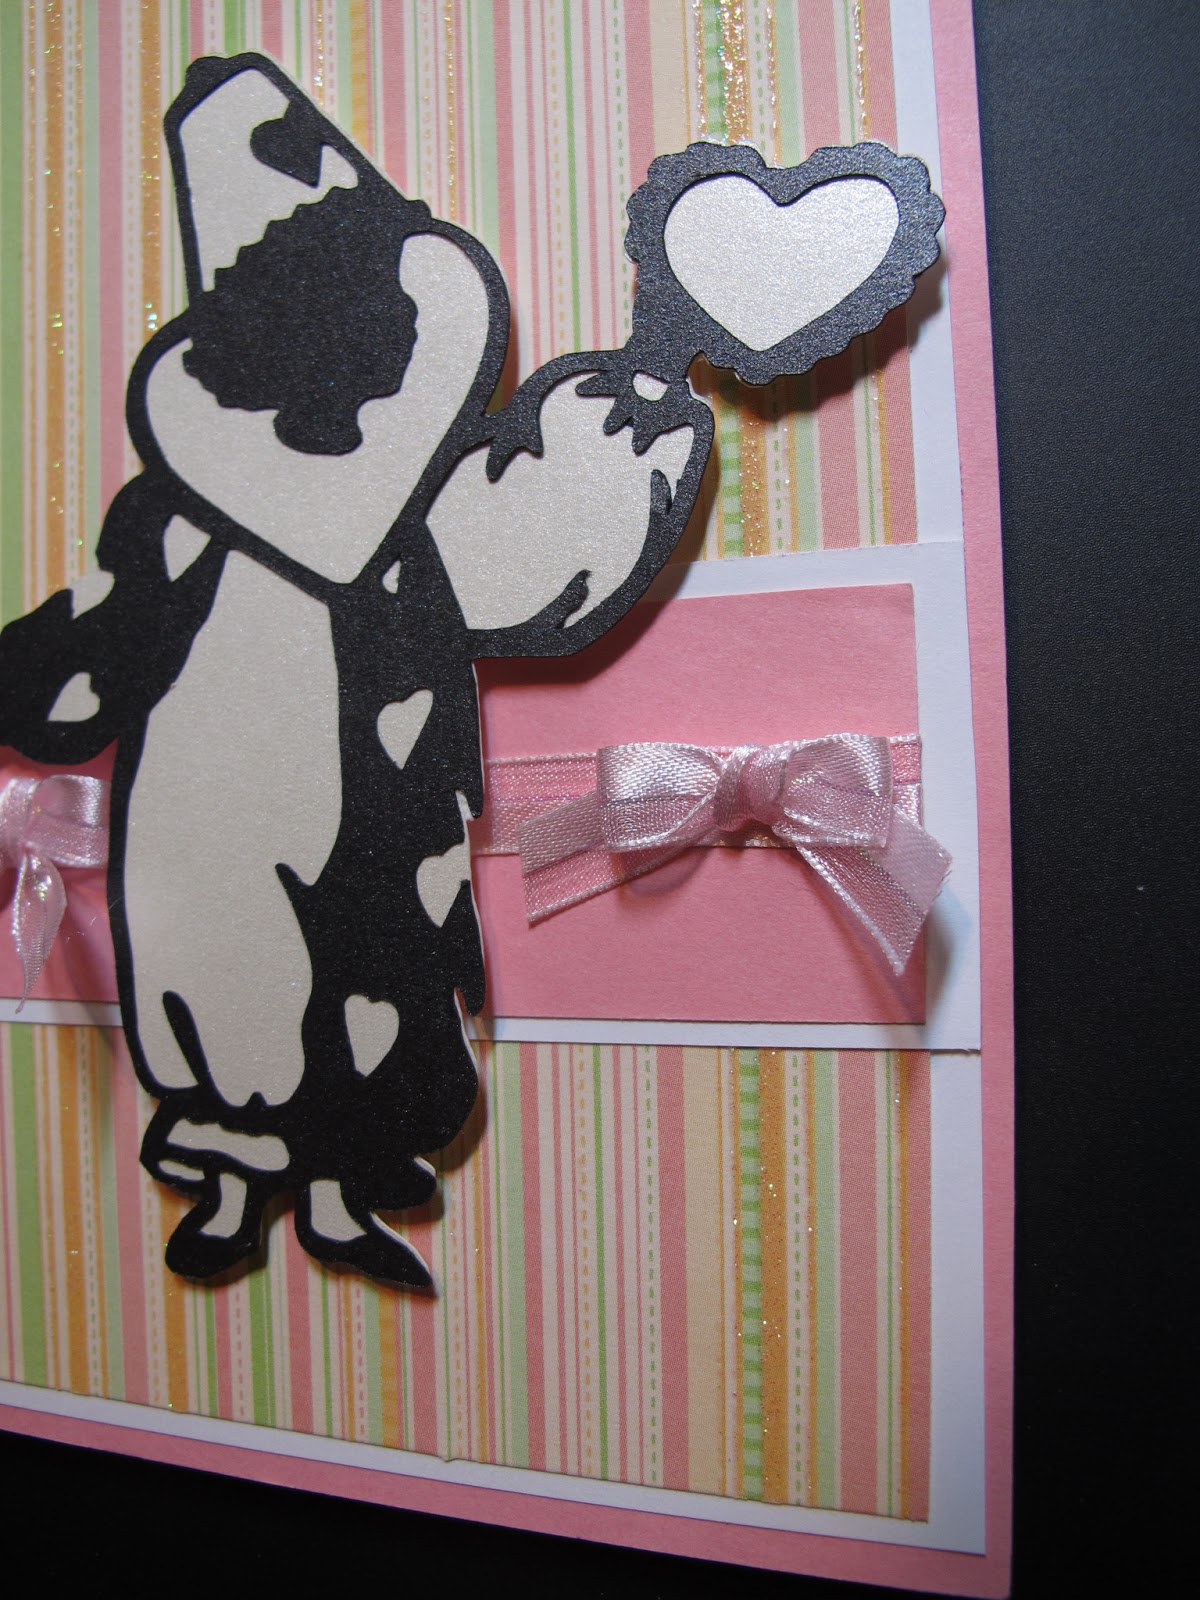
     I was going to make another V-Day card but this image really caught my eye. It's the clown image and only has 2 cuts. What a sweet die cut this is with the silhouette as well. I think this would make a great baby card. I left the bottom right corner with enough space to add a round tag, maybe a congrats message. Here's the girl version:
     This could be for a birthday, congrats baby card and yes, even a Valentines' Day card, lol.
     Both clown cards were raised with pop dots for some dimension.
     I hope I have given you a little inspiration today. I would love if you would tell me what crafting goals you have for the New Year. Mine is to challenge myself to use the carts I have purchased but never used (Shocker!!!) and to make some different style and shaped cards this year.
     Now be sure to hop on over to Robin's and see what crafting goodness she has created to share with you today.
     Here's the line up in case you get lost along the way:

Start http://mycricutcraftroom.blogspot.com/
Jamie M. http://craftygirl21.blogspot.com/ -
Lisa LeMay - http://scrapnooker.blogspot.com/ -
Mary M http://Mary-fortheloveofart.blogspot.com/ -
Robin Carroll - http://cutonedesignsbyrobin.blogspot.com/ -
Erica's Projects - http://ericasprojects.blogspot.com/
Samantha - http://www.samanthascricutcreations.blogspot.com/
Sarah - http://craftingwithsarah.blogspot.com/ -
Sarah Mae - http://itswhatkeepsmesane.blogspot.com/ -
Tami - http://scrappinrabbitdesigns.blogspot.com/ -
Erica's Blog Candy http://ericasblogcandy.blogspot.com/


Vinyl Blogger Bundle