Showing posts with label flower shoppe. Show all posts

Tuesday, June 4, 2013

Altered Box

  
     Good morning my fellow Divas! I'm Diva Mary and I am so happy to show you a neat project as a member of the Cricut Divas DT . Today I am going to show you what I did with an old box a wallet came in and how my Cricut helped me perform some magic. For this project I used my original and trusty Expression as well as the flower Shoppe and
Graphically speaking cartridges. Let's take a look shall we: ???????????????????????????????
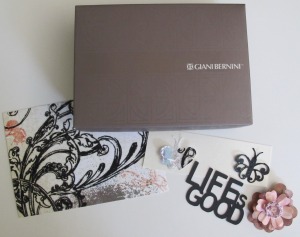
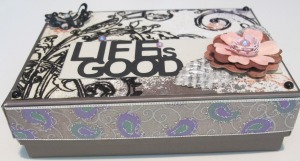
      First I started with an empty box. I pulled out some scrap card stock and was lucky enough to find one that matched perfectly. I even had some pieces to make the flowers! These were cut @ 1" from the image on page 14 in Flower Shoppe. I cut all the layers in the handbook. I inked the edges and then spritzed them with some glimmer mist. here's a tip just in case you don't already know this. When making paper flowers it is best to ink first then mist. If you use the glimmer mist first, then the ink, the glimmer will get on your ink pad and that is not good for future projects. Just a little FYI.
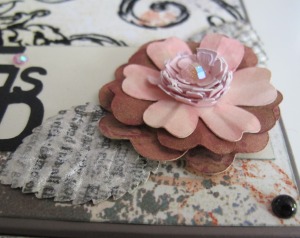
  
     After some ink and glimmer mist the flowers were shaped. I already had some mulberry printed leaves so, a little perfect pearls helped to add some shimmer. The rhinestone is by Crystal It. These are so gorgeous in person.
???????????????????????????????
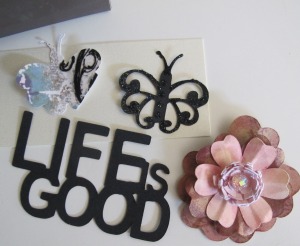
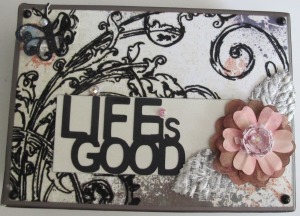
     I cut the butterfly and layer @ 1.25" and the phrase @ 1.50". These images are both found on page 57 in Graphically Speaking. You'll notice that part of the base layer on the butterfly is missing. I used the center point feature on my E but didn't set the blade in the right spot. I was not worried since the top layer would cover it. I added some Black Diamond Stickles to the top layer.  Here's the finished project:
???????????????????????????????
     I also added some ribbon to the edge of the cover to really tie it all together: A few black pearls in the corners added the finishing touch.
???????????????????????????????
     I used this box to give a few gift cards to my daughter for her birthday. Needless to say she loved it! I have some more info about this project on my blog: http://Mary-fortheloveofart.blogspot.com

Thursday, October 11, 2012

Salute To Art Teachers

    
     Well Hello Friday!!! How ya'll doin'? I have had quite the week. October is a HUGE birthday month for us. Mine was the 4th, my twin daughters' on the 7th and a son-in-law's coming up  next week and a grandson at the end of the month. That spells a lot of cards!!!!
     This week Erica's Design Team was asked to do a project with a teacher theme. Since it's Friday that also means we must make a scrapbook page. I knew exactly which Teachers I wanted to spotlight and I also knew I had the perfect pictures to scrap. I hope you will be as amazed by the talent presented here as I always am when I see the artistic abilities that my daughter has. This talent was greatly encouraged and nurtured by her High School Art teacher: Tura Dudley. They have remained good friends even though my daughter has completed Art College and is currently living in California with her husband and Tura has since retired.
     I am in love with the cartridge Frame Of Mind! This is a very intricate cut and can be found on page 9 and is the Lace cut as well as the Lace Blackout. I cut this @ 7.9" to fit the 4"x6" photo. I really wanted the picture to pop so I added a border cut from All Occasion Cake Art. I used a shiny metallic paper and cut it from the image on page 78 using the mirror droplet lowercase (2"x6"). I did cut 2 of these and lined them up with the edges and placed the framed photo on top. I also strung some twine from The Twinery through the holes. Notice the color is pink. This is because the Design Team is using pink not only in our graphics but also in our projects for Breast Cancer Awareness.
     These flowers are from flower Shoppe and are cut @ 1", 1.25" and 1.50". I used the same sizes to cut the leaves and inked the edges with Peeled Paint distress ink. I wanted to keep the titles simple yet elegant so I used the font from Sophisticated. I used Font 2 plus the shadow and cut all at 1". Lastly I decided to add some flourishes with the gem Stone Flourishes by Inkadinkado with Staz On Forest Green Ink. Of course I had to use some Liquid Pearls and the Hydrangea was perfect!
     You can find any of the products in Ericas' Shop. She always has great prices.
     Are you ready to see one of the projects the "student" created? Here it is:
     I am sure there are projects in your area where they recruit local artists to paint objects that are some what symbolic of your area. We live in the area of the Blackstone River where many people canoe. Local businesses sponsor artists to paint with a certain theme. Unibank sponsored my daughter Christine and the idea was to spotlight the various towns along the Blackstone River Valley which stretches from Massachusetts into Rhode Island.
     I carried the same style font on this page and some of the leftover leaves. The "creating" pencil stamp is by Michael's Recollection Stamps.
     The picture of the sunset is not one of the canoe series but the colors were so perfect I included it in the layout especially since it was showcasing Chris' talent. Here's the 2 page layout:


Wednesday, November 2, 2011

The Three Wisemen Card

     As you can see I am on a roll with my Christmas cards this year. The more I do the more intricate I am getting. This is my new favorite for the week, lol. Fortunately I had cut these out in anticipation of our possibly losing power. It is truly a miracle that THIS time we didn't. However you can still see the snow that is left over and this is 5 days later.
     This time I went with a 5x7" card base. The card stock is a cream with a nice sheen to it. The image was cut using the Inspired Heart image @ 3" and the background is from a pale blue glossy card stock.I really love using embossing of all kinds on my cards and this has both dry and heat embossing.The background is Swiss dots whereas I used heat embossing for the stars in the upper right hand corner as well as the sentiment "Unto us a child is born".  The embossing powder is a detail silver and really makes a statement! Both stamps are from Inkadinkado.
     The flower was cut from Flower Shoppe cart by ProvoCraft.  I cut them @ various sizes: 1 3/4" and 1- 1/2". I used a DCWV stack and Donna Salazar's technique with the tulle and added some of her Pixie Dust Glitter. I assembled the card by using silver thread to sew the image and background together before adhering it to the card base.
     I thought the flower would balance the stars off and the colors just seemed to fit.It gives it a quiet elegance don't ya think?
     I also added a sentiment on the inside and used a rich blue ink. It says: "Peace on earth will come to stay, when we live Christmas everyday." I just love this sentiment. It would be wonderful if we could have that warm feeling year round, don't you agree?