My husband is a tool salesman and is in and out of garages all day long. He wanted to offer a package his customers could give their wives, mothers or girl friends for Luv Day. All I had to do was make a simple card and tag to package them up with. No problem I say until he told me he needed 50 of them! Are you serious, 50, in less than a week? I'm a floral designer, my busiest day. How on earth am I going to pull this off you say?
Easy, with a little help from my Imagine and the CCR.
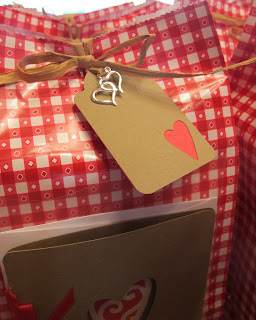
He wanted something very simple, nothing cutesy so we decided on Kraft card stock for the base. I used Art Philosophy and the card feature on page 69 @ 5.50". I used a 12x12" sheet of paper so I was able to cut 2 cards on the same page. Then I cut the solid heart out of red @ 2.75 and the layer in cream @ 2.5. They were so easy to put together since I just traced the open heart with a pencil and adhered the heart in place. I used the score marks on the card to lace some ribbon through and tie in a bow.
I thought it would be too time consuming to use a stamp on all those tags so I turned to the CCR. I first chose the V-Day sentiment from MS Seasonal Cake Art and placed it on the screen. I added a second mat layer to place a tag from Fabulous Finds. This made it easy to size the sentiment in just the right place on the mat. After some copy and pasting, I was able to fit 18 tags on an 8 1/2 x 11" pieces of red card stock.
I am so glad I used separate layers. You can combine them on the same page however, I discovered that by using them separate I could chose whether to cut, print or both. The first time I chose cut and it was not too successful since it cut everything. The red sentiment was usable but since I did not weld the tag was not.
Above you see where I used one mat and printed out the sentiment.
After they were printed I went back and chose the label mat I had made and so I was able to just cut the label. This was helpful so I could also cut more labels to glue my cut sentiments to. (Waste not want not, lol).
This is the printed label. I just went back and added some faux stitching with a white pen.
I also cut a 3" heart tag on the same page on Art Philosophy. One cut was with the heart and the red base on solid card stock. Added just a cute heart charm and they were done! I actually wound up doing 60! Bet you would love to see what is inside:
That's right ladies: pink socks, folding scissors and a chocolate rose pop! Don't laugh, the socks are really comfortable. They got 1 pair each of the low, crew and mid calf socks. I would have loved to make a frilly card but these guys are down to earth and really didn't want to spend a fortune on flowers. They are really practical guys!!!
I really hope you will try the Cricut Craft Room (CCR). I was intimidated at first but found it a real time saver to finish this project. Now please go back to http://mycricutcraftroom.blogspot.com/ and see what the rest of the design Team has to show you.
I really hope you will try the Cricut Craft Room (CCR). I was intimidated at first but found it a real time saver to finish this project. Now please go back to http://mycricutcraftroom.blogspot.com/ and see what the rest of the design Team has to show you.


